1. Decompress
kernel source code and execute below commands to modify the file sama5d3mb.dtsi
# cd linux-at91/
# gedit arch/arm/boot/dts/sama5d3mb.dtsi
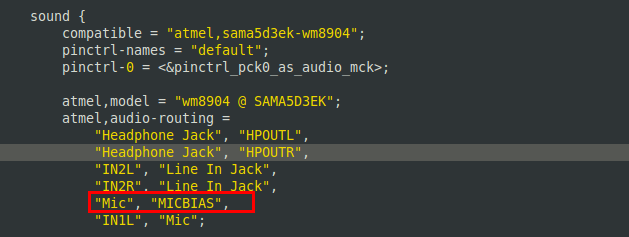
Find the sound configuration and add the lines "Mic",
"MICBIAS" in the location as shown in below diagram:
Execute below commands and recompile the
kernel:
./make_image.sh linux-512mb
If the DDR2 is 256MB, please use the
command: ./make_image.sh linux256mb
After compilation, please replace the
old uImage by newly created uImage (in arch/arm/boot/) and then reprogram.
2. Login in Linux and execute:
# alsamixer
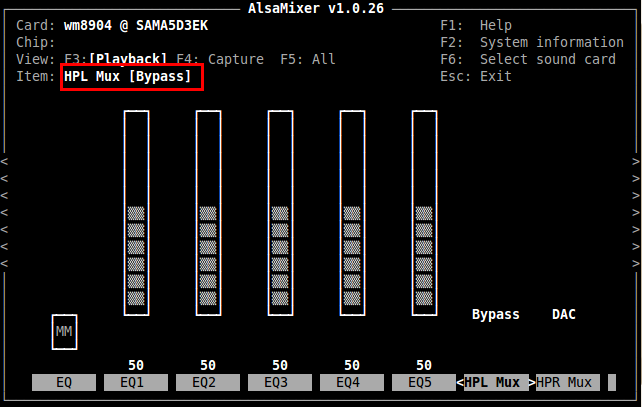
3. Use
the left/right direction keys on keyboard to switch the item to HPL Mux [ADC],
and then press up/down direction keys to switch to Bypass, such as the diagram
shown below:
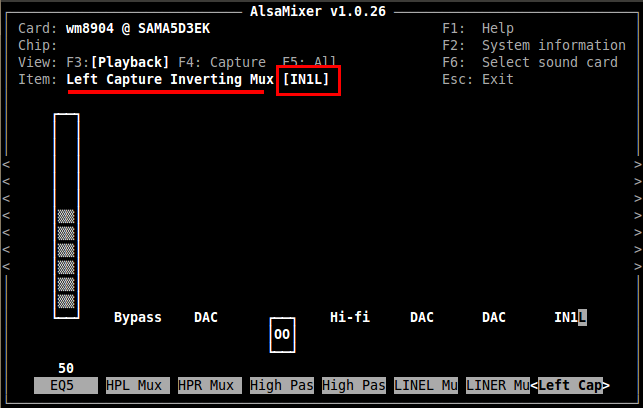
4. Use the left/right keys on keyboard to switch
the Iteam to Left Capture Inverting Mux and then press the up/down direction
keys to switch to IN1L, such as the diagram shown below:
5. After
above configuration, we can use the MIC on board for recording and playback
testing.It equals to a microphone function. If you no need synch-playback, you
don’t need to execute the step 3.
|


