Events
Trade Shows
Seminars
Product Updates
 
          Home > News Center > Product Updates
 

Bring up the STM32MP135x - ST Training Course based on MYD-YF13X (I)

 
2023-9-18   16:56:22     Click: 648
 

In this article, we will take MYIR’s MYD-YF13X and the STM32MP135F-DK as examples to explain how to use STM32CubeMX combined with the developer package to implement the booting of the minimal system.


1. Development Preparation

1.1 Developer package preparation

a. Developer Package Download:

https://www.st.com/en/embedded-software/stm32mp1dev.html

b. Unzip it and Access the Source Folder:


c. Source Code Preparation (can be prepared according to the third point in README.HOW_TO.txt in each source folder):

  • TFA Source Code


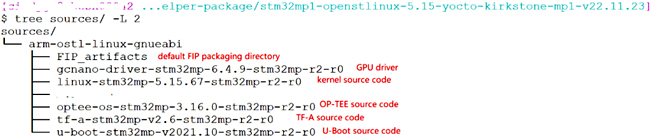
$> cd tf-a-stm32mp-v2.6-stm32mp-r2-r0

$> tar xf tf-a-stm32mp-v2.6-stm32mp-r2-r0.tar.xz

$> cd tf-a-stm32mp-v2.6-stm32mp-r2

$> for p in `ls -1 ../*.patch`; do patch -p1 < $p; done


  • OP-TEE Source Code


$> cd optee-os-stm32mp-3.16.0-stm32mp-r2-r0

$> tar xf optee-os-stm32mp-3.16.0-stm32mp-r2-r0.tar.xz

$> cd optee-os-stm32mp-3.16.0-stm32mp-r2

$> tar xf ../fonts.tar.gz

$> for p in `ls -1 ../*.patch`; do patch -p1 < $p; done


  • U-Boot Source Code


$> cd u-boot-stm32mp-v2021.10-stm32mp-r2-r0

$> tar xf u-boot-stm32mp-v2021.10-stm32mp-r2-r0.tar.xz

$> cd u-boot-stm32mp-v2021.10-stm32mp-r2

$> for p in `ls -1 ../*.patch`; do patch -p1 < $p; done


  • Kernel Source Code


$> cd linux-stm32mp-5.15.67-stm32mp-r2-r0

$> tar xf linux-5.15.67.tar.xz

$> cd linux-5.15.67

$> for p in `ls -1 ../*.patch`; do patch -p1 < $p; done


1.2 SDK Installation

Please read the WIKI to complete Install_the_SDK.

1.3 STM32CubeProgrammer Installation

Please follow the commands/steps given by WIKI to install CubeProgrammer and libusb Installation.


2. Block Diagram

First please review MYIR's schematic framework:


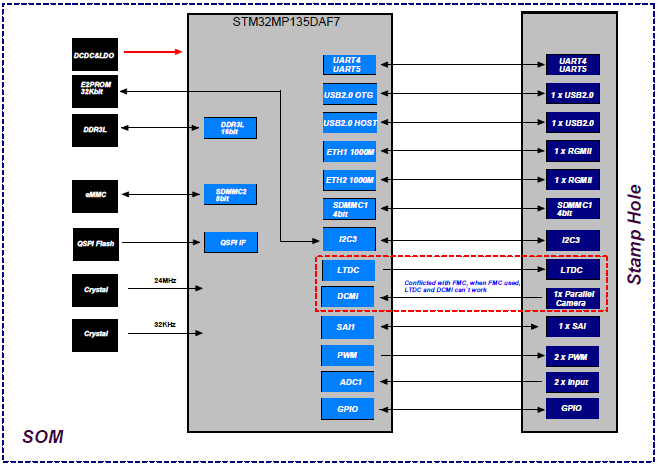
The following hardware configuration information can be derived from the block diagram:
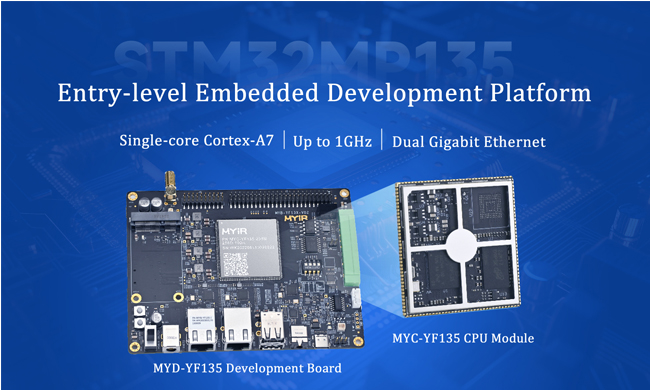
1. STM32MP135DAF7

2. DDR3L

3. Separate power supply design

4. Support QSPI NAND, SD card boot

5. Dual Gigabit Ethernet ports

6. USB Host

7. USB OTG (for burning)

8. UART4 debug serial port

9. External Clock Source, HSE (24MHz), LSE (32.768KHz)


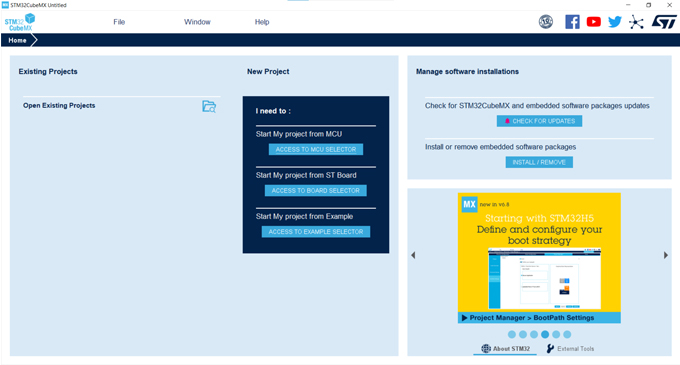
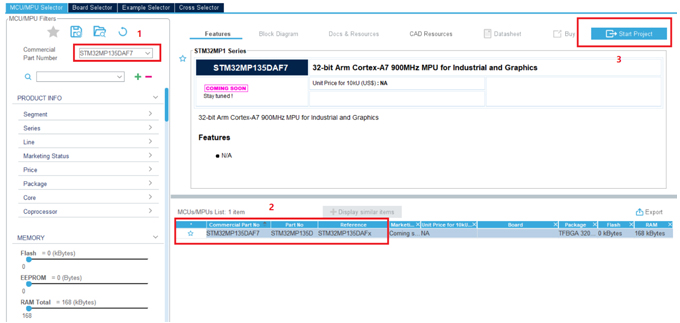
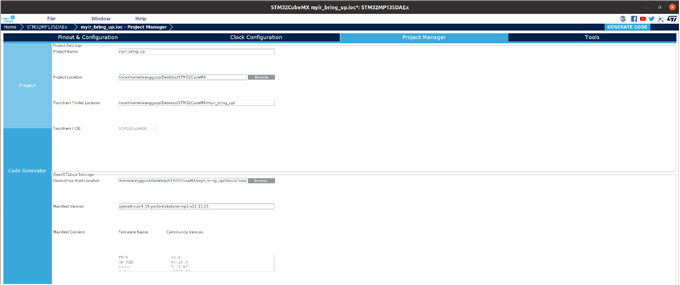
3.
STM32CubeMX Project Creation

Open STM32CubeMX, select the correct chip package according to the chip's part number and start the project creation.

e.g. MYIR uses STM32MP135DAF7.


Clicking "Generate Code" will create a nearly empty project, the device tree structure:


NOTE: The rule for STM32CubeMX is to build the Kernel dts first, then copy the generated dts file to the u-boot folder. In other words, the device tree of u-boot stm32mp135d-myir_bring_up-mx.dts is copied from the Kernel directory, so when you modify the device tree and add User code in U-Boot stage, please modify the device tree of Kernel synchronously, or copy the modified device tree to the Kernel directory. This will prevent the modification of the u-boot part from being overwritten by the unmodified device tree of the kernel when CubeMX builds the device tree next time.

Creates the device tree link:


  • TFA


PC $> cd

PC $> ln -s /local/home/xxx/Desktop/STM32CubeMX/myir_bring_up/DeviceTree/myir_bring_up/tf-a/* fdts/


  • OP-TEE:


PC $> cd

PC $> ln  -s /local/home/xxx/Desktop/STM32CubeMX/myir_bring_up/DeviceTree/myir_bring_up/optee-os/* core/arch/arm/dts/


  • U-Boot:


PC $> cd

PC $> ln  -s /local/home/xxx/Desktop/STM32CubeMX/myir_bring_up/DeviceTree/myir_bring_up/u-boot/* arch/arm/dts/


Training materials are not yet complete, please pay attention to the next article.


Prev:  Take Great Advantages of SemiDrive’s Super Powerful D9-Pro Processor Next:  MYIR Launched Six-core ARM-A55 D9-Pro based SoM for Industrial Applications